GraphGrid Training from the Graph via Airflow and NLP-model-training
Overview
- Set up a basic python environment
- create a
venv - activate environment
- install dependencies
- create a
- Develop a custom ETL pipeline
- create a transformation script using python to read and transform graph data to
the
Wikigoldformat
- create a transformation script using python to read and transform graph data to
the
- Train with the newly transformed data
- trigger the DAG with JSON configuration
- kick off training session for the NLP-model-training DAG to train a new NER model
- Convert the transformation script into a scheduled DAG that extracts from ONgDB hourly
- create the ETL pipeline docker image
- create the DAG and update the script within the project directory
- upload the DAG for use
- use the newly trained model with the NLP module
Python Library Requirements
It's recommended to use python>=3.7. This tutorial will leverage the following
python dependencies:
apache-airflow==2.2.2
apache-airflow-providers-docker==2.3.0
neo4j==1.7.6
neobolt==1.7.17
neotime==1.7.4
pytz==2021.1
six==1.15.0
boto3==1.17.27
fire==0.4.0
Setup environment
For the purposes of this tutorial we will leverage the local CDP directory, however,
any directory can be used without effecting the tutorial. The directory in which
we will house all the resources and assets of this tutorial is ${var.misc.graphgrid_data}/airflow_tutorial.
Therefore, we can start out by creating that directory by running the following command in a terminal
while inside the local CDP directory:
export $(xargs <.env)
mkdir ${var.misc.graphgrid_data}/airflow_tutorial
Virtual environments (or venvs) provide dependency and library isolation, and their
documentation can be found here.
In order to create a virtual environment, the following command can be run in a terminal.
python3 -m venv ${var.misc.graphgrid_data}/airflow_tutorial/venv
Common errors include:
The virtual environment was not created successfully because ensurepip is not
available.  On Debian/Ubuntu systems, you need to install the python3-venv
package using the following command.

    apt install python3.8-venv

You may need to use `sudo` with that command.  After installing the python3-venv
package, recreate your virtual environment.
which, as prompted, can be remedied with apt install python3.8-venv.
sudo may need to be used for the above commands.
Then, in order to use the virtual environment, we must activate it, which depends on the
platform and shell. See the following table for a list of ways to activate the venv.
| Platform | Shell | Command to activate virtual environment |
|---|---|---|
| POSIX | bash/zsh | $ source ${var.misc.graphgrid_data}/airflow_tutorial/venv/bin/activate |
| fish | $ source ${var.misc.graphgrid_data}/airflow_tutorial/venv/bin/activate | |
| csh/tcsh | $ source ${var.misc.graphgrid_data}/airflow_tutorial/venv/bin/activate.csh | |
| PowerShell Core | $ ${var.misc.graphgrid_data}/airflow_tutorial/venv/bin/Activate.ps1 | |
| Windows | cmd.exe | C:\> ${var.misc.graphgrid_data}\airflow_tutorial\venv\Scripts\activate.bat |
| PowerShell | PS C:\> ${var.misc.graphgrid_data}\airflow_tutorial\venv\Scripts\Activate.ps1 |
With the newly activated virtual environment, we now need to install our dependencies. In a terminal, execute:
python3 -m pip install apache-airflow==2.2.2 apache-airflow-providers-docker==2.3.0 neo4j==1.7.6 neobolt==1.7.17 neotime==1.7.4 pytz==2021.1 six==1.15.0 boto3==1.17.27 fire==0.4.0
sudo may need to be used for the above command.
This should display output similar to:
...
Collecting pytz==2021.1
  Using cached pytz-2021.1-py2.py3-none-any.whl (510 kB)
Collecting six==1.15.0
  Using cached six-1.15.0-py2.py3-none-any.whl (10 kB)
Collecting boto3==1.17.27
  Using cached boto3-1.17.27-py2.py3-none-any.whl (130 kB)
Collecting jmespath<1.0.0,>=0.7.1
  Using cached jmespath-0.10.0-py2.py3-none-any.whl (24 kB)
Collecting s3transfer<0.4.0,>=0.3.0
  Using cached s3transfer-0.3.7-py2.py3-none-any.whl (73 kB)
Collecting botocore<1.21.0,>=1.20.27
  Using cached botocore-1.20.112-py2.py3-none-any.whl (7.7 MB)
Collecting python-dateutil<3.0.0,>=2.1
  Using cached python_dateutil-2.8.2-py2.py3-none-any.whl (247 kB)
Collecting urllib3<1.27,>=1.25.4
  Using cached urllib3-1.26.7-py2.py3-none-any.whl (138 kB)
Installing collected packages: six, pytz, neotime, neobolt, neo4j, jmespath, python-dateutil, urllib3, botocore, s3transfer, boto3
Successfully installed boto3-1.17.27 botocore-1.20.112 jmespath-0.10.0 neo4j-1.7.6 neobolt-1.7.17 neotime-1.7.4 python-dateutil-2.8.2 pytz-2021.1 s3transfer-0.3.7 six-1.15.0 urllib3-1.26.7
Intro
Airflow and NLP-model-training can be employed to kick off training pipelines and DAGs from any data source. However, data must be transformed into one of the supported formats in order to be trainable within our pipelines. For a complete list of all the supported dataset formats, please refer to the NLP-model-training documentation here.
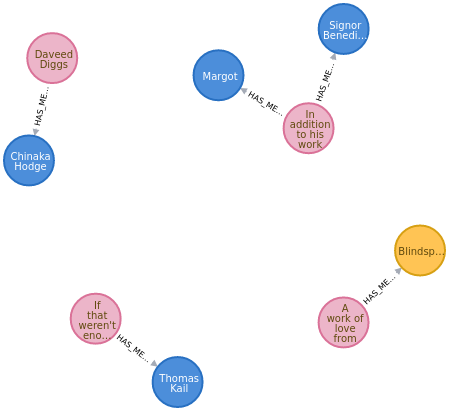
For the purposes of this tutorial we will leverage data stored within ONgDB in
order to train a new model. Our data takes the form of Sentence nodes which are
connected to Mention nodes through the HAS_MENTION relationship. Sentence
nodes contain the property sentence, while Mention nodes contain the properties
value for the actual mention, and ne which lists the mention's type of named-entity. Below are examples of these nodes, which includes a movie review sentence
for the movie (Mention) Blindspotting.
{
  "identity": 271,
  "labels": [
    "GraphGridResource",
    "Resource",
    "Sentence"
  ],
  "properties": {
    "sentence": "A work of love from the actors and writers, Blindspotting was a personal and heartfelt story about a gentrifying town they lived in. ",
    "createdAt": "2021-12-17T22:22:50+00:00",
    "grn": "grn:gg:sentence:G2N3TVedJzTx0qTYtMudNT4zzMzThWan3Cjqx8SaXoSb",
    "lastSearchIndexedAt": "0",
    "sentenceNumber": 60,
    "updatedAt": "2021-12-17T22:22:50+00:00"
  }
}
{
  "identity": 77,
  "labels": [
    "GraphGridResource",
    "Mention",
    "NER_Miscellaneous",
    "Resource"
  ],
  "properties": {
    "mentionId": "blindspotting_en",
    "multiplicity": 1,
    "createdAt": "2021-12-17T22:22:50+00:00",
    "grn": "grn:gg:mention:e6oc2Jzn35oGzTsNcAAJGAz8dLRQuIc3wKgAi9XbMNZO",
    "lastSearchIndexedAt": "0",
    "pos": [
      "VBG"
    ],
    "ne": [
      "MISCELLANEOUS"
    ],
    "language": "en",
    "value": "Blindspotting",
    "updatedAt": "2021-12-17T22:22:50+00:00"
  }
}
For this tutorial, we will use these nodes in order to train a named_entity_recognition (NER) model. The first step for using this custom data in a new training session is to determine which dataset/corpora format to convert our data into. The Wikigold dataset has a simple formatting scheme wherein each line contains a word and its associated named-entity tag/label. The simplicity in its formatting scheme makes it a good choice.
Therefore, using python, we can read in data from the graph, transform it into
the Wikigold format, then save it out to MinIO for use with Airflow.
Sample Data
Copy and paste the contents of this file to add text nodes to your graph!Creating a Transformation Script with Python
We'll be creating a transformation script with python in order to read and transform our graph data into the Wikigold format. The following sections
break down the transformation script that we'll be saving as a file within the package directory.
Querying ONgDB with Neo4j Python Driver
Using the Neo4j Python Driver, we can connect to ONgDB in order to query and retrieve data stored in the graph to train upon it.
import neo4j

def run_ongdb_query():
    get_sent_mention_gql = 'MATCH (sentence:Sentence)-[hm:HAS_MENTION]->(mention:Mention) RETURN sentence, mention'

    with neo4j.GraphDatabase.driver('bolt://localhost:7687', auth=('ongdb', 'admin')) as local_driver, local_driver.session() as local_session:

        results: neo4j.BoltStatementResult = local_session.run(
            get_sent_mention_gql)
        nodes = results.data('sentence', 'mention')
    return nodes
First, we have to craft a Geequel query that retrieves the data from the graph.
Using neo4j.GraphDatabase.driver we can then connect to a ONgDB database with the default credentials.
After creating the local session, we can run our query to get our training data.
It appears all pre neo4j python driver 1.7 documentation has been taken down from their site.
Transforming graph data into Wikigold formatted data
After retrieving data from the graph, we can now iterate through each sentence
and transform it into the expected Wikigold format.
def transform_data(nodes):
    training_file = ""
    for datapoint in nodes:
        sentence: str = datapoint.get('sentence').get('sentence')
        mention: str = datapoint.get('mention').get('value')
        mention_label: str = datapoint.get('mention').get('ne')[0]
        split_sentence: list = [
            f"{word} O\n" if word != mention else f"{mention} {convert_labels(mention_label)}\n"
            for word in sentence.replace("\n", "").strip().split(" ")]
        split_sentence += [". O\n", "\n"]
        training_file += "".join(split_sentence)
    return training_file
We transform our data via a simple list comprehension
where we sanitize the sentence, split it based on spaces to separate individual words, then construct
the proper WORD WORD_LABEL line syntax.
Converting Native Labels to Wikigold Formatted Labels
Our data differs in the labeling schema from that of Wikigold. Therefore, we have to define a simple map that transforms our data's labeling scheme into the Wikigold formatting scheme.
LABEL_MAP = {
    "ORGANIZATION": "I-ORG",
    "LOCATION": "I-LOC",
    "PERSON": "I-PER",
    "MISCELLANEOUS": "I-MISC"
}


def convert_labels(label: str):
    return LABEL_MAP[label]
Saving to MinIO
After transforming our data into the expected format, we now need to save it out
to MinIO in order for it to be usable for training with Airflow and NLP-model-training.
Therefore, using the boto3 library, we can encode our data and save it out to
the com-graphgrid-datasets bucket as graph_training_data.txt.
import boto3
from botocore.config import Config

def save_to_minio(training_file: str):
    resource = boto3.resource('s3', aws_access_key_id="minio",
                              aws_secret_access_key="minio123",
                              endpoint_url="http://localhost:9000",
                              config=Config(signature_version='s3v4'))

    object = resource.Object("com-graphgrid-datasets", "graph_training_data.txt")

    object.put(Body=(bytes(training_file.encode('UTF-8'))))
The complete extraction file
We can save this script at ${var.misc.graphgrid_data}/airflow_tutorial/script.py.
Then in order to run and execute our script we can run the following command in a terminal:
python3 ${var.misc.graphgrid_data}/airflow_tutorial/script.py
import neo4j
import boto3
from botocore.config import Config


LABEL_MAP = {
    "ORGANIZATION": "I-ORG",
    "LOCATION": "I-LOC",
    "PERSON": "I-PER",
    "MISCELLANEOUS": "I-MISC"
}


def convert_labels(label: str):
    return LABEL_MAP[label]


def run_ongdb_query():
    get_sent_mention_gql = 'MATCH (sentence:Sentence)-[hm:HAS_MENTION]->(mention:Mention) RETURN sentence, mention'

    with neo4j.GraphDatabase.driver('bolt://localhost:7687', auth=('ongdb', 'admin')) as local_driver, local_driver.session() as local_session:

        results: neo4j.BoltStatementResult = local_session.run(
            get_sent_mention_gql)
        nodes = results.data('sentence', 'mention')
    return nodes


def transform_data(nodes):
    training_file = ""
    for datapoint in nodes:
        sentence: str = datapoint.get('sentence').get('sentence')
        mention: str = datapoint.get('mention').get('value')
        mention_label: str = datapoint.get('mention').get('ne')[0]
        split_sentence: list = [
            f"{word} O\n" if word != mention else f"{mention} {convert_labels(mention_label)}\n"
            for word in sentence.replace("\n", " ").strip().split(" ")]
        split_sentence += [". O\n", "\n"]
        training_file += "".join(split_sentence)
    return training_file


def save_to_minio(training_file: str):
    resource = boto3.resource('s3', aws_access_key_id="minio",
                              aws_secret_access_key="minio123",
                              endpoint_url="http://localhost:9000",
                              config=Config(signature_version='s3v4'))

    object = resource.Object("com-graphgrid-datasets", "graph_training_data.txt")

    object.put(Body=(bytes(training_file.encode('UTF-8'))))


def main():
    nodes = run_ongdb_query()
    training_file = transform_data(nodes)
    save_to_minio(training_file)


if __name__ == '__main__':
    main()
We can inspect our newly generated training file within a terminal with the AWS CLI with the following command:
AWS_ACCESS_KEY_ID=minio AWS_SECRET_ACCESS_KEY=minio123 aws --endpoint-url http://${var.api.shellBase}:9000 s3 cp s3://com-graphgrid-datasets/graph_training_data.txt -
This command uses the default minio credentials, therefore, you must substitute them if you are not using the default credentials.
It is also possible to inspect the file contents without the AWS CLI by going to
${var.api.shellBase}:9000. If using the default credentials, you can log in using:
Default username: minio
Default password: minio123
otherwise, use the randomly generated credentials. From the homepage, select the bucket
com-graphgrid-datasets, which contains datasets and other data which can be used to
train NLP models.
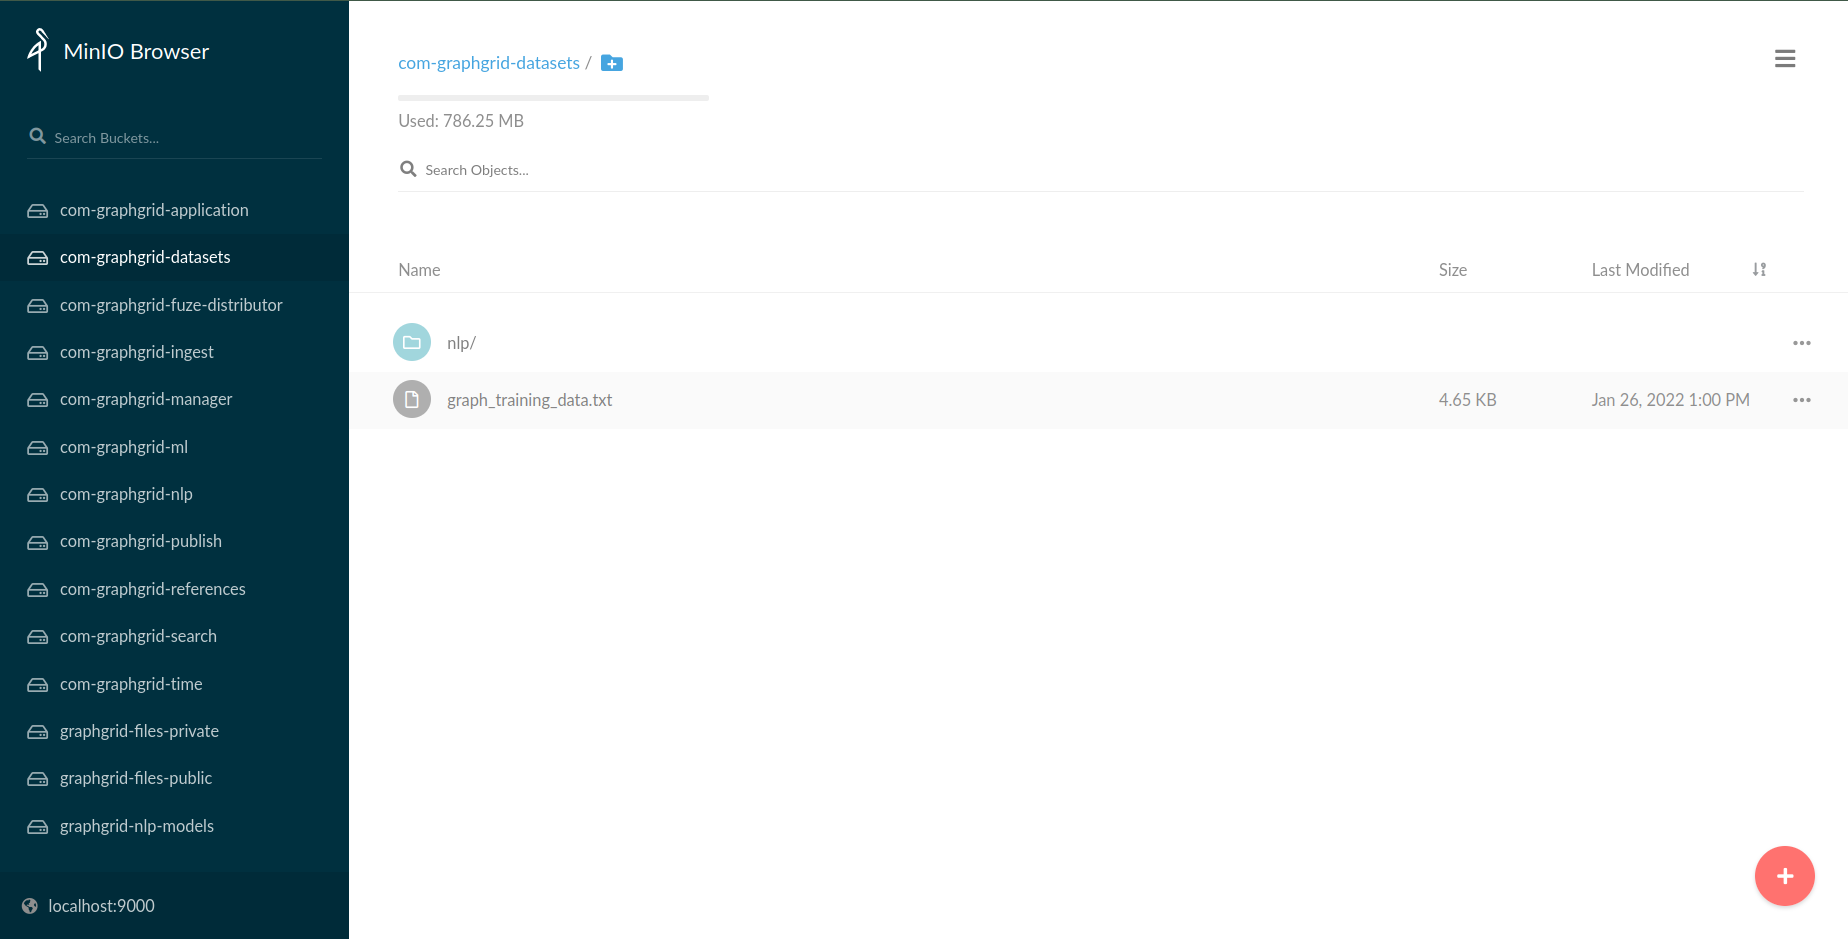
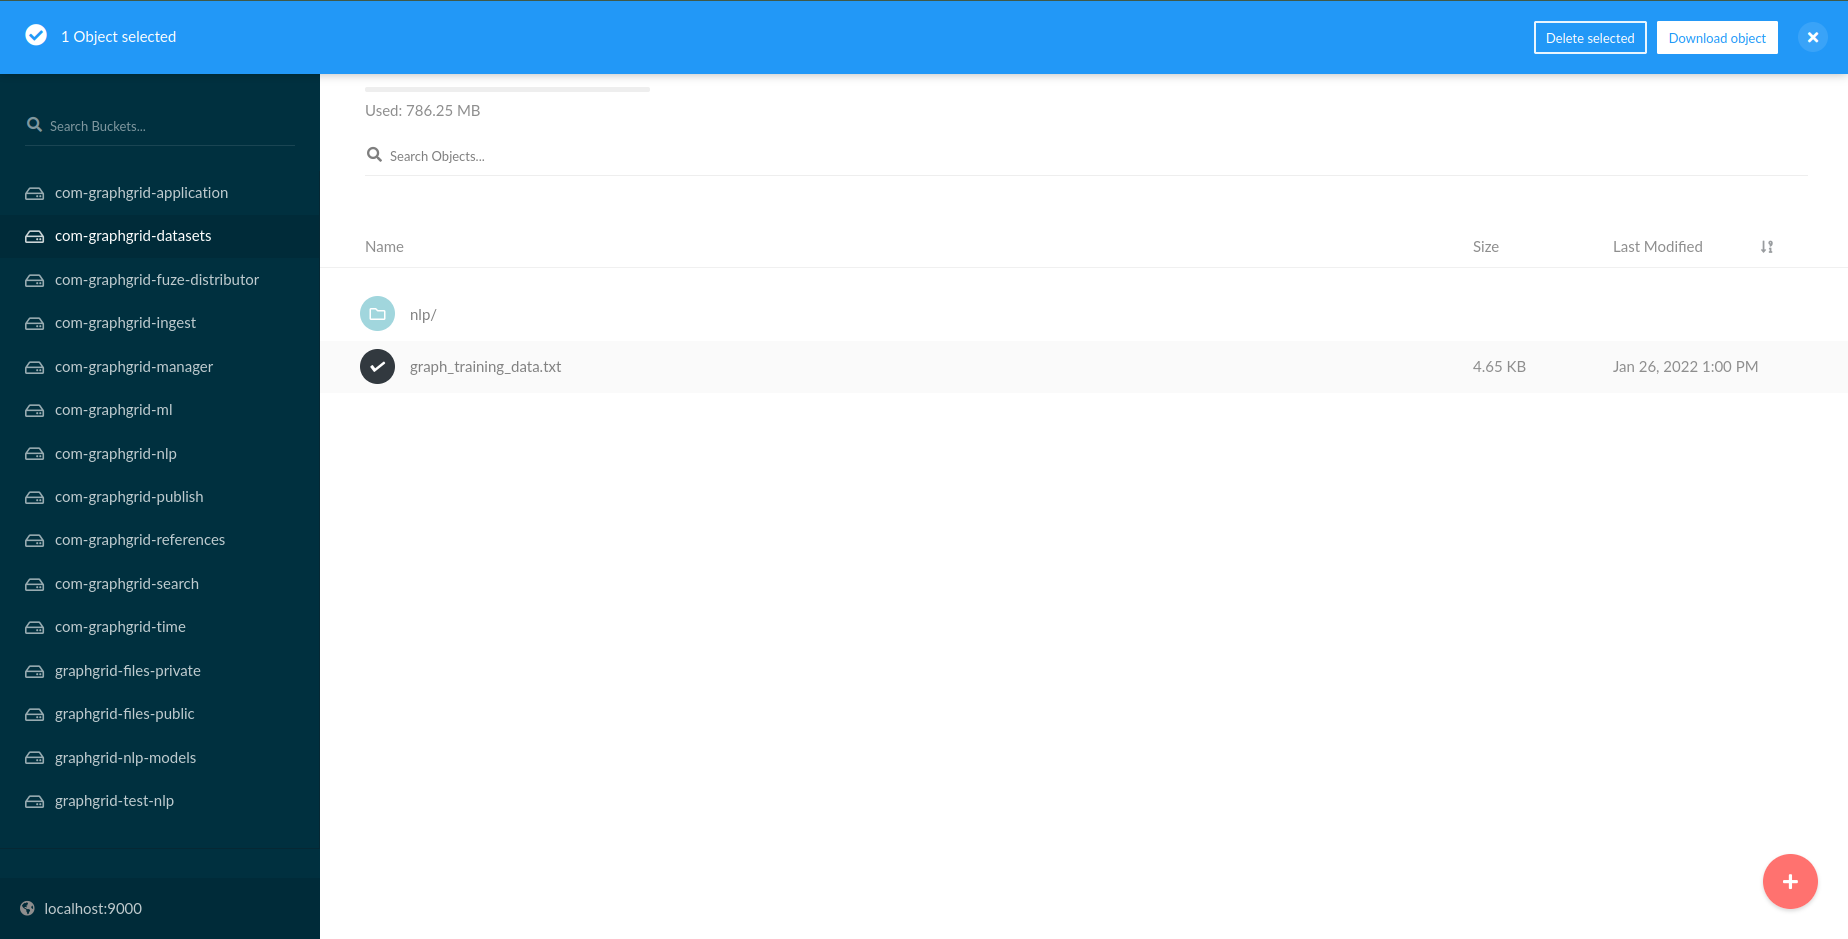
From here, we can select the graph_training_data.txt file and click the Download Object
UI element at the top right. The file can then be opened and inspected using
whichever preferred method.
This should yield output similar to (albeit not truncated):
Becoming O
The O
Fighting O
Frenchman O
While O
Daveed O
Diggs O
was O
becoming O
a O
prolific O
rapper O
in O
niche O
circles, O
it O
wasn't O
until O
he O
performed O
in O
Hamilton I-PER
that O
he O
became O
a O
very O
big O
deal. O
. O

With O
the O
incredible O
success O
of O
Hamilton I-PER
both O
on O
and O
Off-Broadway, O
as O
well O
as O
touring O
around O
the O
country, O
including O
Puerto O
Rico, O
Lin-Manuel O
Miranda O
has O
created O
one O
of O
the O
most O
beloved O
musicals O
of O
the O
2010s. O
. O
We can see how our data is now in the expected Wikigold format.
Training with the new data
Now that our data is saved to MinIO, we can open up the Airflow Webserver in order to
kick off a training session at API_BASE:8081. In order to access the nlp_model_training DAG, you will need to log in with
Default username: airflow
Default password: airflow
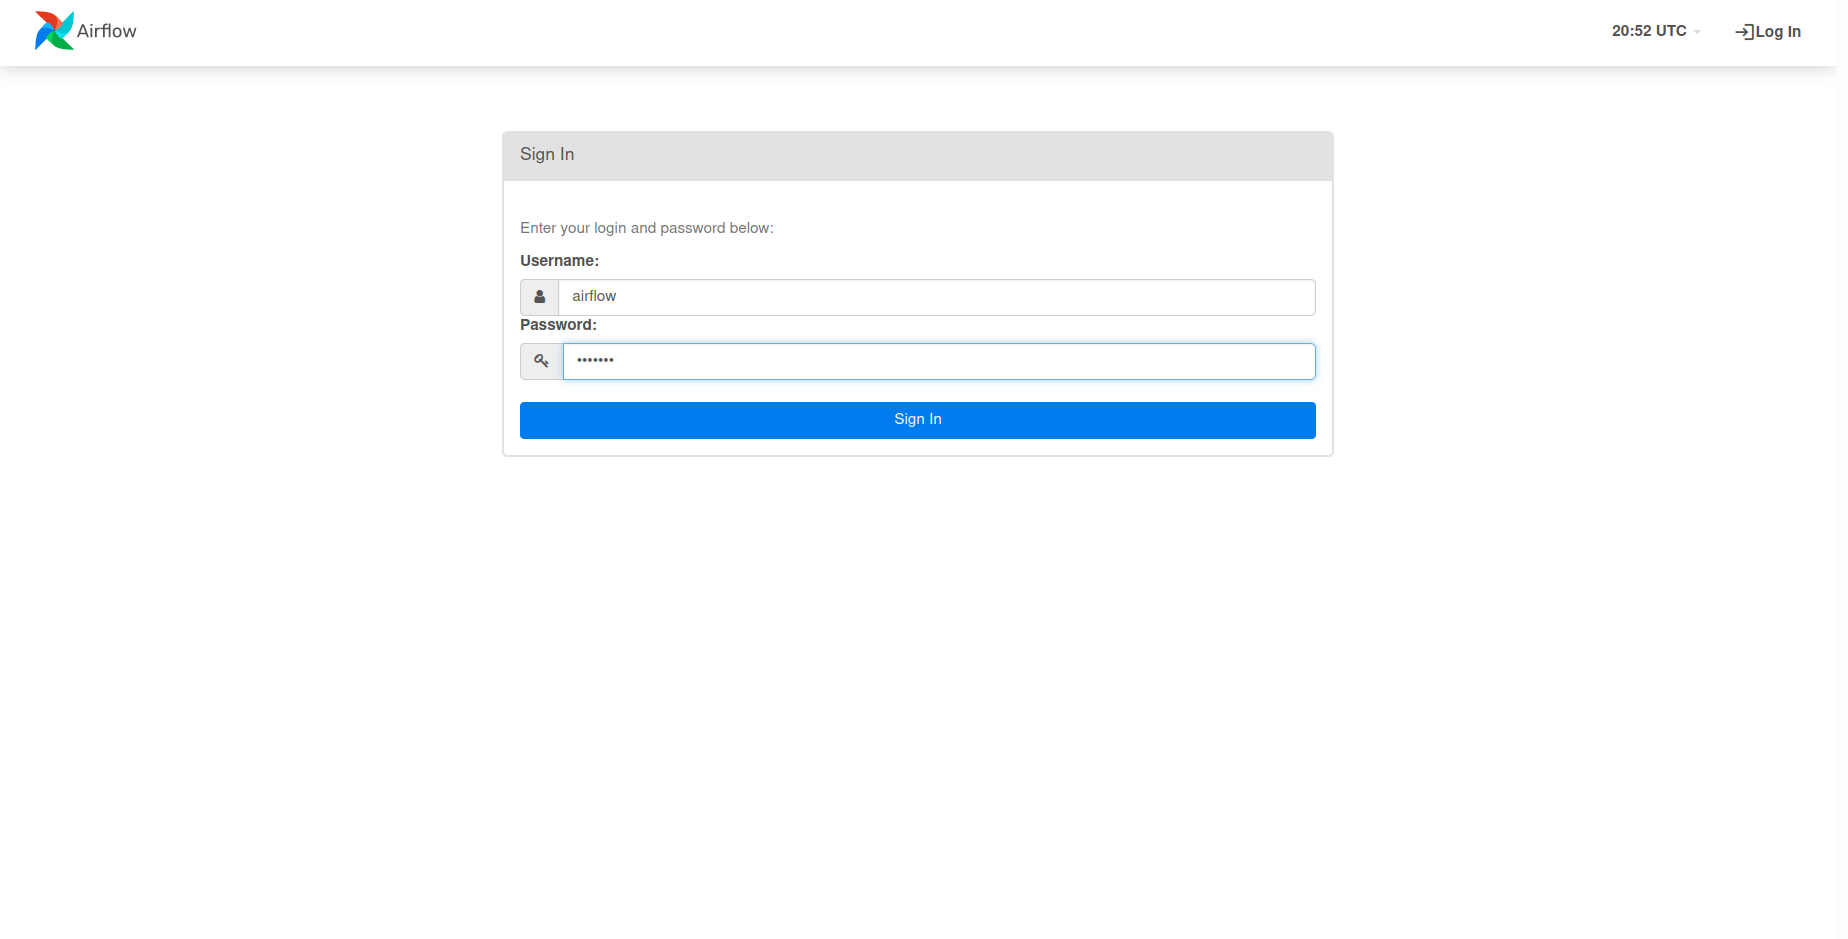
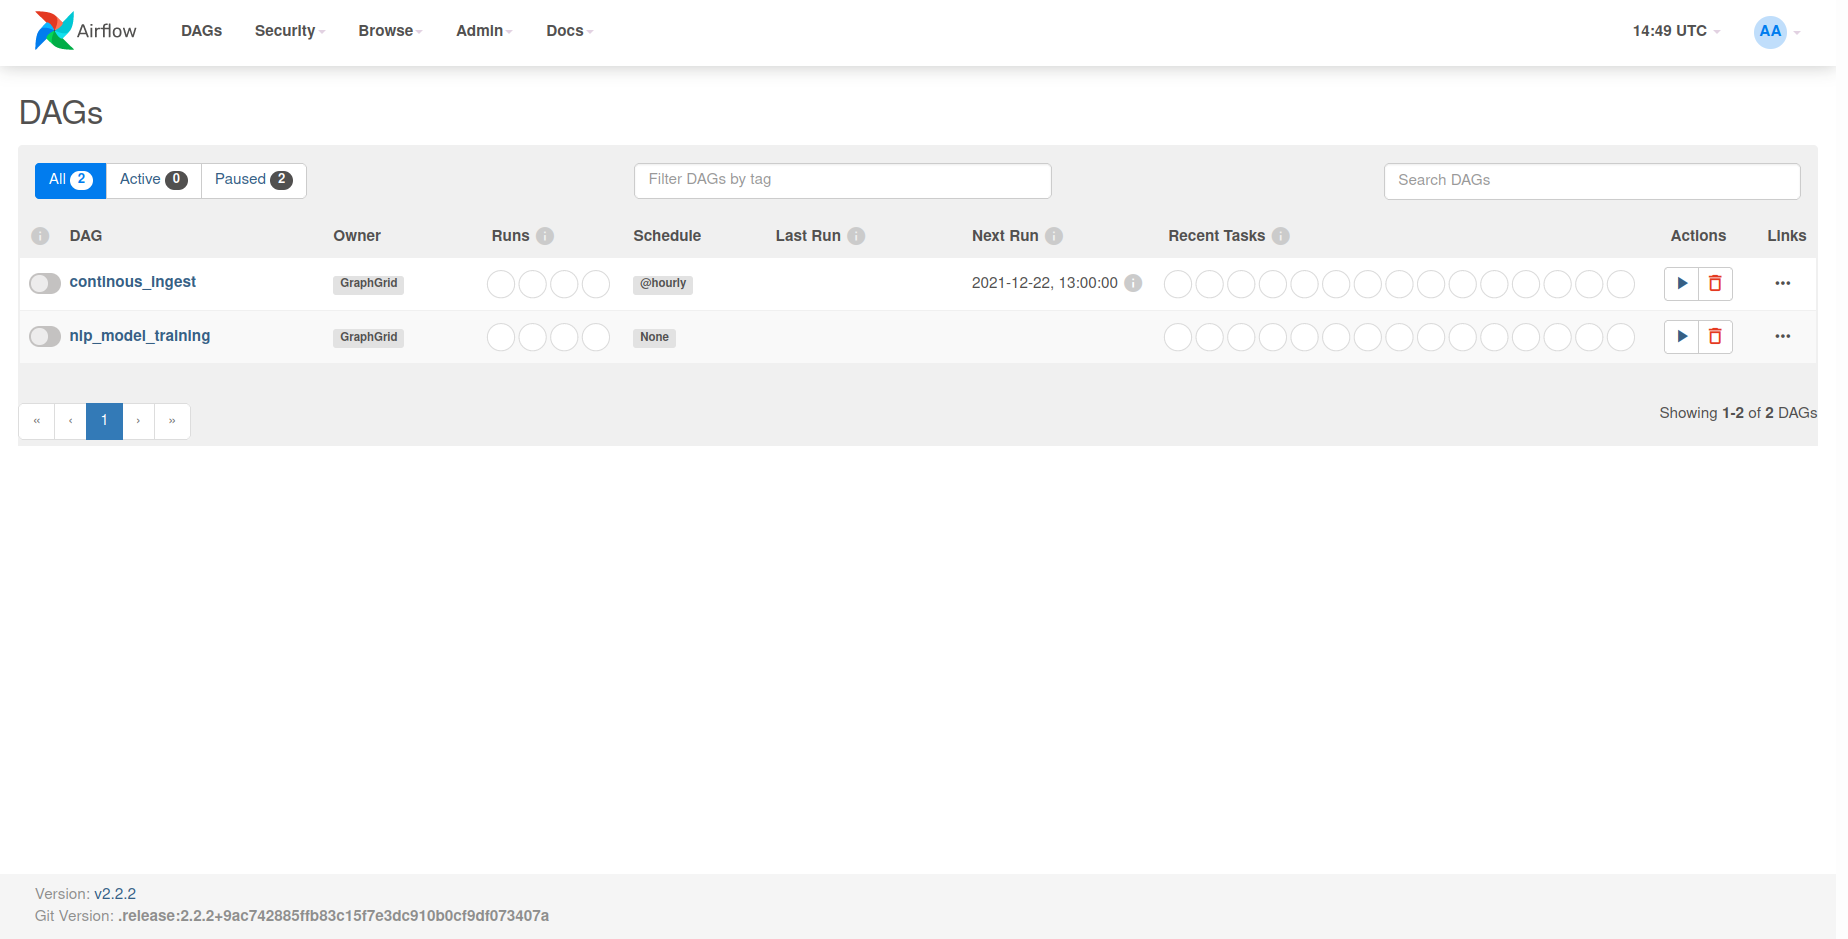
Following the login screen, you will be greeted with the following homescreen.
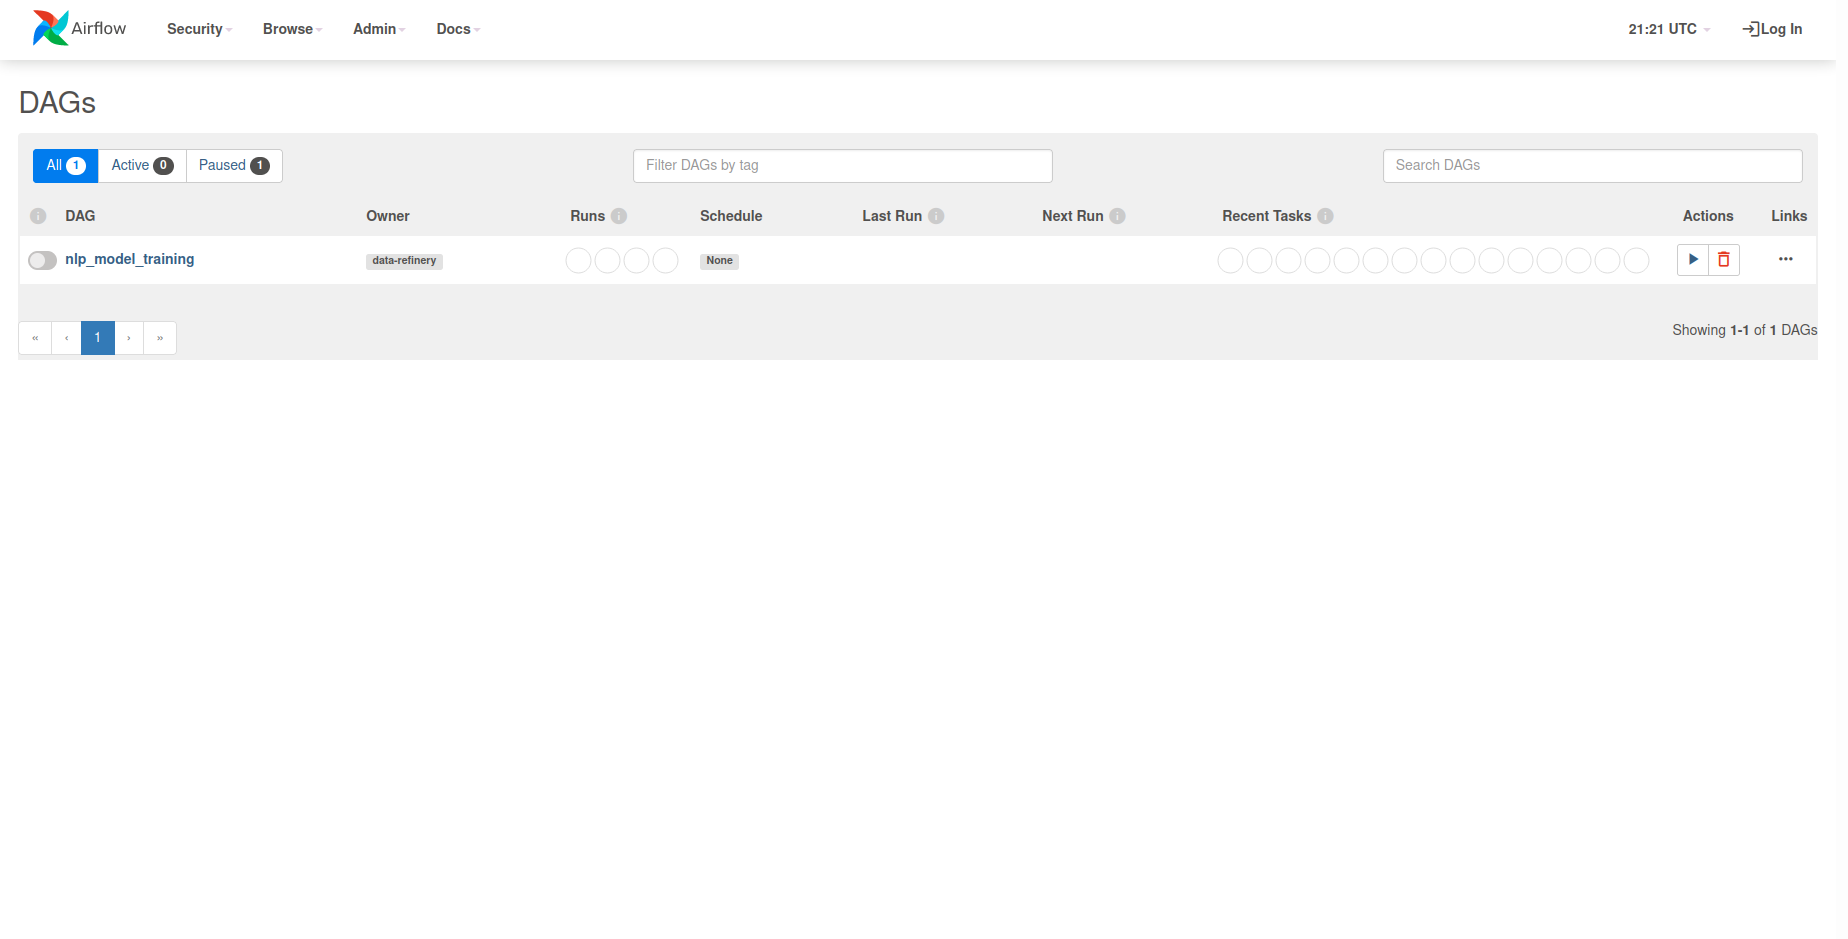
From here, you can select the nlp_model_training DAG under the DAGs list. This will
present you with the entire DAG and show all the tasks that comprise it. In
order to kick off a new training session for a named_entity_recognition model, we need
to first craft a request body containing all of the relevant information.
{
    "model": "named_entity_recognition",
    "datasets": {"wikigold":{"train":"graph_training_data.txt","eval":"None"}}
}
The datasets field within the request body defines where Airflow and NLP-model-training
will attempt to download our training file. This field is a string encoded json object. The pertitent
field within it being train which we specify as graph_training_data.txt, as we saved our
training file as graph_training_data.txt at the top level of the bucket. Had we saved the file within sub-folders,
we would've specified the train field as some/path/with/folders/to/graph_training_data.txt.
Depending on your local environment's configuration, "gpu": true and "no_cache": true can also be added to the request body in order to
enable GPU acceleration and no caching. However, refer to the Airflow reference documentation for limitations on these fields.
We can now use this request body by selecting the Play Icon UI element located at
the top right side of the page. Once clicked, you will want to select Trigger DAG w/ config
in order to use our request body.
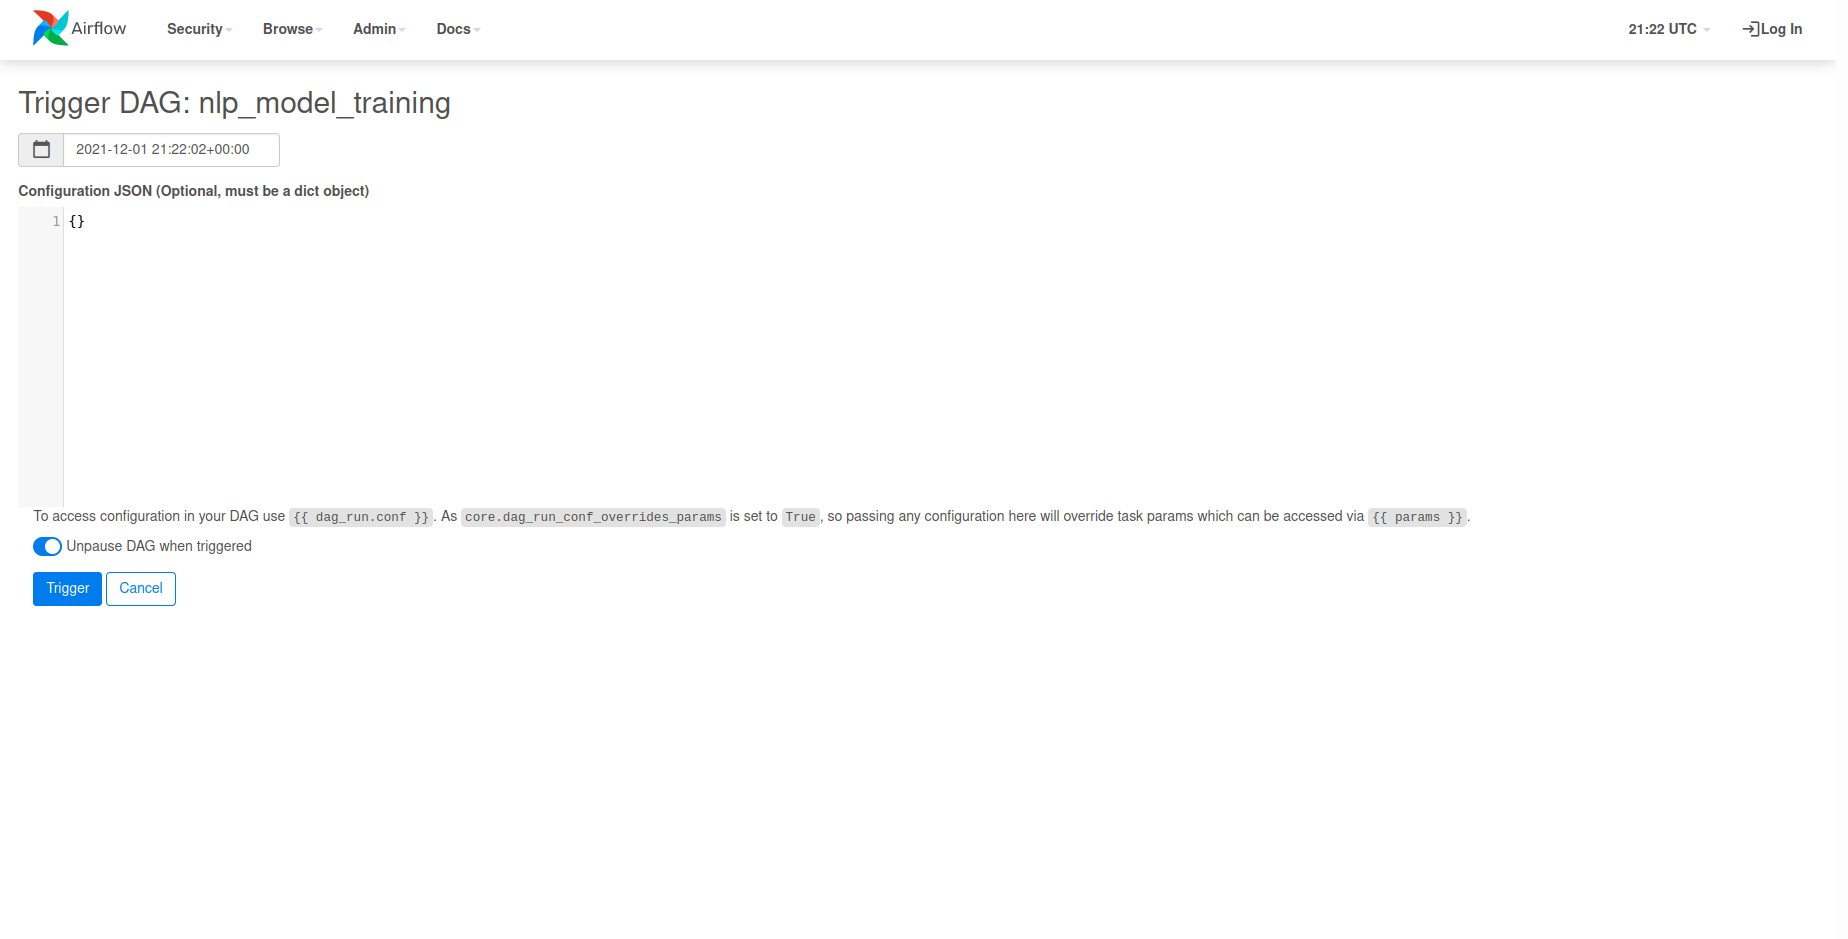
We can now paste our request body into the Configuration JSON input field and click Trigger
to kick off training.
This will initiate a training session for our named_entity_recognition model with our data from the graph.
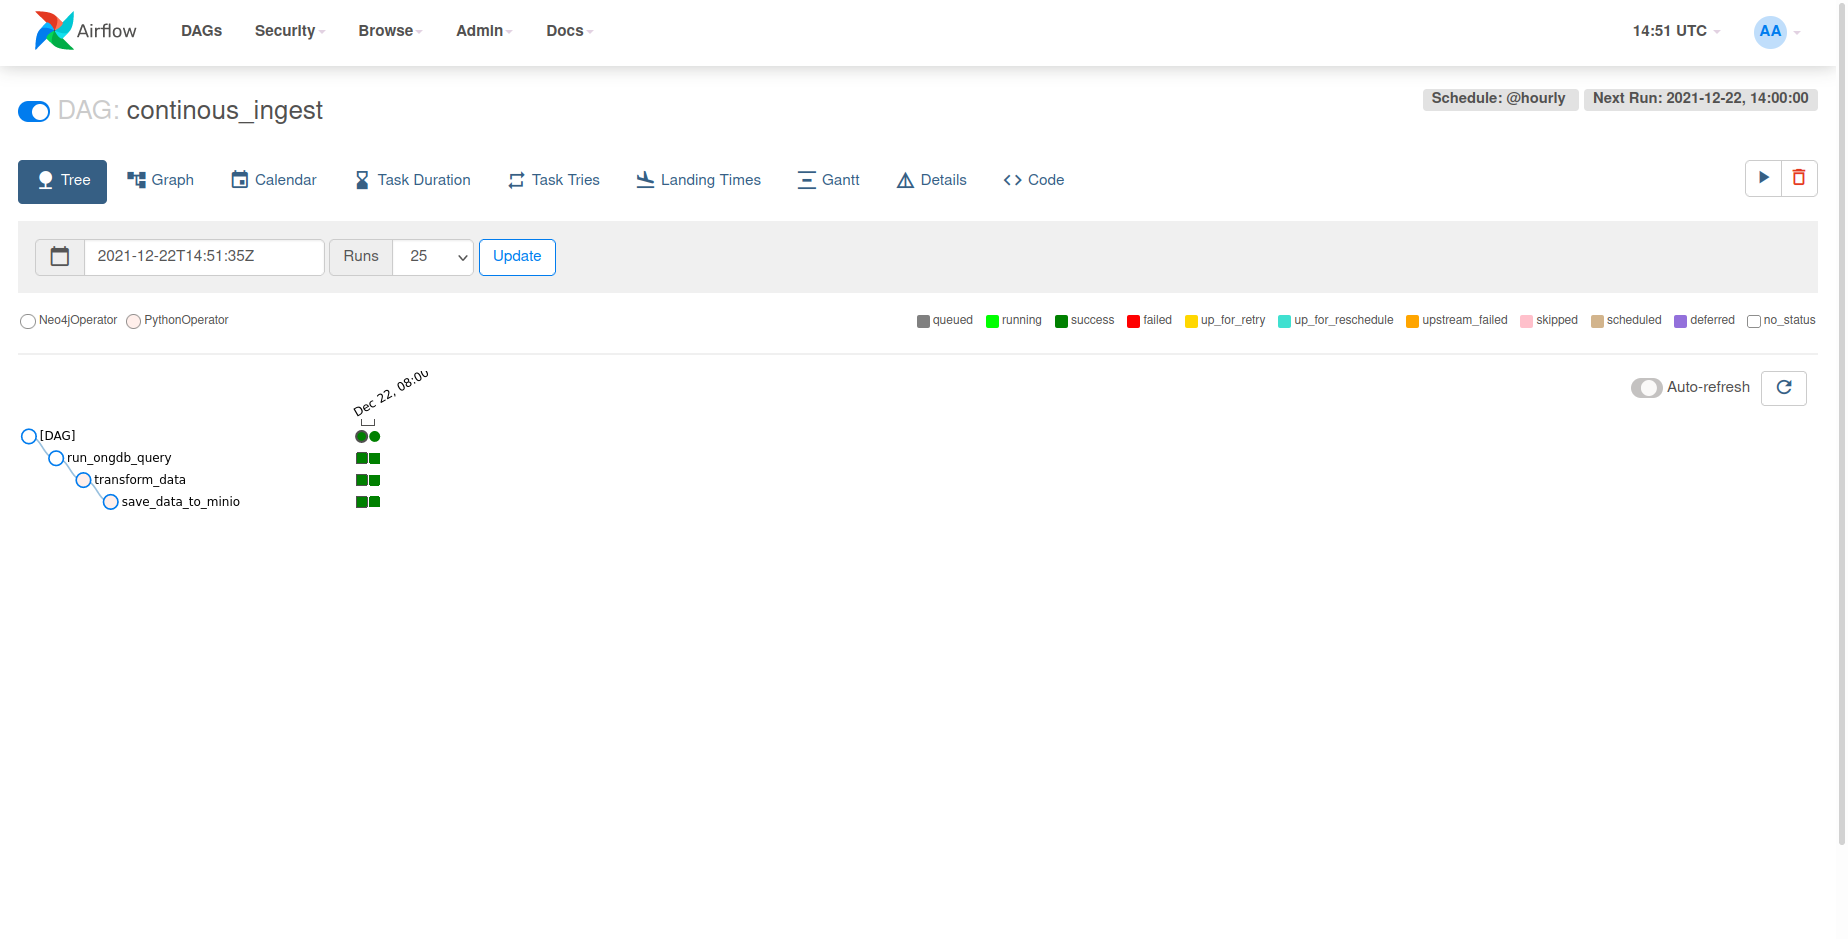
Converting our transformation script to a DAG to continually ingest
We can take this a step further and convert our script to a DAG,
rather than having our script exist statically as something we manually have to run
in order to train new models upon our graph data. This tutorial sets up a basic ETL
pipeline to extract data from ONgDB, transform it into the Wikigold format, and save it
to MinIO in order to be loaded and trained upon by our named_entity_recongition model.
The following sections break down each part of the process of converting
our script into a DAG.
Switching towards a docker-encapsulated execution paradigm
The simplest development paradigm for custom DAGs is creating a docker image which includes callable modules and/or functions that will be invoked as tasks within the Airflow DAG. This avoids any dependency alterations, inclusions, or issues on the running Airflow instances as docker allows for complete dependency packaging and isolation.
Creating the ETL pipeline docker image
The following docker image provides all the basic functionality in order to convert
our python script into a full-fledged continuously scheduled Airflow DAG, which we
can save at ${var.misc.graphgrid_data}/airflow_tutorial/continuous_ingest.dockerfile.
FROM python:3.7-slim

RUN apt update && apt -y install && apt -y upgrade \
    bash
RUN pip install --upgrade pip

WORKDIR /airflow_tutorial
COPY script.py script.py
COPY requirements.txt requirements.txt

RUN python3 -m pip install -r requirements.txt

ENTRYPOINT ["python3", "script.py"]
CMD ["--help"]
This image emulates much of the work we did in the first part of this tutorial
wherein we set up our local environment in order to develop our ETL pipeline. However,
this image is still missing some key components. First, we're missing a requirements.txt,
which defines all the python libraries needed to run our ETL pipeline. Therefore, we can
create a requirements.txt file at ${var.misc.graphgrid_data}/airflow_tutorial/requirements.txt
with the following contents:
apache-airflow==2.2.2
apache-airflow-providers-docker==2.3.0
neo4j==1.7.6
neobolt==1.7.17
neotime==1.7.4
pytz==2021.1
six==1.15.0
boto3==1.17.27
fire==0.4.0
Before we can build this image we need to create our actual Airflow DAG as well as
modify script.py in order to facilitate its employment with Airflow as a DAG.
Creating the DAG
We first need to create our tangible DAG object, which houses all of our tasks in order to get a continually executing ETL pipeline operational. These are the parameters we will use in order to get our DAG functional with their description from the Airflow Documentation.
dag_id: The id of the DAG; must consist exclusively of alphanumeric characters, dashes, dots and underscores (all ASCII)default_args: A dictionary of default parameters to be used as constructor keyword parameters when initialising operators. Note that operators have the same hook, and precede those defined here, meaning that if your dict contains 'depends_on_past': True here and 'depends_on_past': False in the operator's call default_args, the actual value will be False.start_date: The timestamp from which the scheduler will attempt to backfillschedule_interval: Defines how often that DAG runs, this timedelta object gets added to your latest task instance's execution_date to figure out the next schedulecatchup: Perform scheduler catchup (or only run latest)? Defaults to True
from airflow import DAG
from airflow.utils.dates import days_ago
from airflow.providers.docker.operators.docker import DockerOperator


default_args = {
    'owner': 'GraphGrid',
}


dag = DAG(
    dag_id='continuous_ingest',
    default_args=default_args,
    start_date=days_ago(1),
    catchup=False,
    schedule_interval="@hourly",
)
We set our schedule_interval as @hourly in order to have our DAG
re-create the training samples each hour. This emulates the scenario wherein
data is constantly changing or being ingested and models need to be retrained
to reflect that.
Converting our python script to Airflow tasks
As we're leveraging Docker encapsulation, all of our tasks will take on the following basic outline:
tX = DockerOperator(
    task_id="<method_name>",
    dag=dag,
    retries=0,
    image="airflow-tutorial",
    auto_remove=True,
    command=["<method_name>", "[<method_args>]"],
    network_mode="graphgrid",
    do_xcom_push=True,
    docker_url="tcp://socat:2375",
)
The DockerOperator allows us to spin up our airflow-tutorial docker image to run
one of the predefined ETL pipeline methods. To highlight some basic DockerOperator
features: auto_remove cleans up the docker container after execution, command allows
us to specify which method we want to run within script.py, network_mode is defined
as graphgrid as that is the network which CDP creates and runs on, and docker_url defines
the Docker daemon's URL which is served at tcp://socat:2375. For more information regarding
the DockerOperator visit the official Airflow documentation
here.
Therefore, we define each task within our DAG in the following way:
t0 = DockerOperator(
    task_id="run_ongdb_query",
    dag=dag,
    retries=0,
    image="airflow-tutorial",
    auto_remove=True,
    command=["run_ongdb_query"],
    network_mode="graphgrid",
    do_xcom_push=True,
    docker_url="tcp://socat:2375",
)


t1 = DockerOperator(
    task_id="transform_data",
    dag=dag,
    retries=0,
    image="airflow-tutorial",
    auto_remove=True,
    command=["transform_data",
             "--nodes", "{{ ti.xcom_pull(task_ids='run_ongdb_query') }}"],
    network_mode="graphgrid",
    do_xcom_push=True,
    docker_url="tcp://socat:2375",
)


t2 = DockerOperator(
    task_id="save_to_minio",
    dag=dag,
    retries=0,
    image="airflow-tutorial",
    auto_remove=True,
    command=["save_to_minio",
             "--training_file", "{{ ti.xcom_pull(task_ids='transform_data') }}"],
    network_mode="graphgrid",
    do_xcom_push=False,
    docker_url="tcp://socat:2375",
)
A couple highlights to note are: XCOM
usage which allows us to easily propagate data between our tasks. Our transformation task
pulls the output from its upstream extraction task while our load task pulls the output
from its upstream transformation task. The XCOMs are defined through
jinja templates,
which allows Airflow to pass dynamic information into task instances.
Additionally, we disable do_xcom_push as our save_to_mino task does not have any
downstream tasks.
Defining DAG task execution order
The final step is to define upstream and downstream tasks in order for our tasks to execute in their logical order. Meaning, have the query run first, followed by the transformation step, and finished with our save step.
t1.set_upstream(t0)
t2.set_upstream(t1)
The complete DAG
Combining all of these steps together, we arrive at our python module containing
our completed continous ingestion DAG. We can save this under ${var.misc.graphgrid_data}/airflow_tutorial/dag.py.
from airflow import DAG
from airflow.utils.dates import days_ago
from airflow.providers.docker.operators.docker import DockerOperator


default_args = {
    'owner': 'GraphGrid',
}


dag = DAG(
    dag_id='continuous_ingest',
    default_args=default_args,
    start_date=days_ago(1),
    catchup=False,
    schedule_interval="@hourly",
)


t0 = DockerOperator(
    task_id="run_ongdb_query",
    dag=dag,
    retries=0,
    image="airflow-tutorial",
    auto_remove=True,
    command=["run_ongdb_query"],
    network_mode="graphgrid",
    do_xcom_push=True,
    docker_url="tcp://socat:2375",
)


t1 = DockerOperator(
    task_id="transform_data",
    dag=dag,
    retries=0,
    image="airflow-tutorial",
    auto_remove=True,
    command=["transform_data",
             "--nodes", "{{ ti.xcom_pull(task_ids='run_ongdb_query') }}"],
    network_mode="graphgrid",
    do_xcom_push=True,
    docker_url="tcp://socat:2375",
)


t2 = DockerOperator(
    task_id="save_to_minio",
    dag=dag,
    retries=0,
    image="airflow-tutorial",
    auto_remove=True,
    command=["save_to_minio",
             "--training_file", "{{ ti.xcom_pull(task_ids='transform_data') }}"],
    network_mode="graphgrid",
    do_xcom_push=False,
    docker_url="tcp://socat:2375",
)

t1.set_upstream(t0)
t2.set_upstream(t1)
Modifying script.py
The first alteration needed in order to convert our script into an Airflow DAG
is having the ability for each ETL task to be easily callable by Airflow. For that
we leverage fire, which is a Python library that converts any python component
into a command line interface (CLI). As our previous sentence implies, fire "wraps"
a python component, therefore, we'll create a Pipeline class which will house
all of our individual ETL pipeline tasks. See the pseudocode below:
class Pipeline:
    def run_ongdb_query(self):
        ...

    def transform_data(self, nodes):
        ...

    def save_to_minio(self, training_file):
        ...

def main():
    fire.Fire(Pipeline)
This scheme allows us to execute our individual methods in the following manner:
python3 script.py save_to_minio --training_file "Blindspotting I-MISC\n..."
The next modification required is altering the run_ongdb_query task in order
to make the returned nodes serializable, as per the docs, XCOMs "can have any
(serializable) value". This is important because the neo4j python driver's query
returns Nodes which are not serializable objects. For this we'll define the method
extract_node_properties, which will iterate through our query results, extract
each node's properties, and store them in a serializable list of dicts.
def extract_node_properties(data: List[Dict]) -> List[Dict]:
    nodes = []
    for datapoint in data:
        intermediary_dict = {}
        for key, node in datapoint.items():
            intermediary_dict[key] = node._properties
        nodes.append(intermediary_dict)

    return nodes
The final alteration is changing the return of each method within our ETL pipeline
to instead be a simple print statement. This is in order to propagate our data
between each task, as the Airflow BaseOperator's do_xcom_push in combination
with the DockerOperator's xcom_all push the last line of the container's stdout
as an XCOM for downstream tasks to use. This means that the last line of output from
our container will be the query results, or the transformed query results depending
on the task. See the following pseudocode below:
class Pipeline:
    def run_ongdb_query(self):
        ...
        print(self.extract_node_properties(nodes), end='')

    def transform_data(self, nodes):
        ...
        print(training_file)

    def save_to_minio(self, training_file):
        ...
All of these culminate in the final fully modified script.py below:
from typing import List, Dict
import neo4j
import boto3
from botocore.config import Config
import fire


LABEL_MAP = {
    "ORGANIZATION": "I-ORG",
    "LOCATION": "I-LOC",
    "PERSON": "I-PER",
    "MISCELLANEOUS": "I-MISC"
}


class Pipeline:
    @staticmethod
    def convert_labels(label: str):
        return LABEL_MAP[label]

    @staticmethod
    def extract_node_properties(data: List[Dict]) -> List[Dict]:
        nodes = []
        for datapoint in data:
            intermediary_dict = {}
            for key, node in datapoint.items():
                intermediary_dict[key] = node._properties
            nodes.append(intermediary_dict)

        return nodes

    def run_ongdb_query(self):
        get_sent_mention_gql = 'MATCH (sentence:Sentence)-[hm:HAS_MENTION]->(mention:Mention) RETURN sentence, mention'

        with neo4j.GraphDatabase.driver('bolt://ongdb:7687', auth=(
                'ongdb',
                'admin')) as local_driver, local_driver.session() as local_session:
            results: neo4j.BoltStatementResult = local_session.run(
                get_sent_mention_gql)
            nodes = results.data('sentence', 'mention')
        print(self.extract_node_properties(nodes), end='')

    def transform_data(self, nodes):
        training_file = ""
        for datapoint in nodes:
            sentence: str = datapoint.get('sentence').get('sentence')
            mention: str = datapoint.get('mention').get('value')
            mention_label: str = datapoint.get('mention').get('ne')[0]
            split_sentence: list = [
                f"{word} O\n" if word != mention else f"{mention} {self.convert_labels(mention_label)}\n"
                for word in sentence.replace("\n", " ").strip().split(" ")]
            split_sentence += [". O\n", "\n"]
            training_file += "".join(split_sentence)
        print(training_file)

    @staticmethod
    def save_to_minio(training_file):
        resource = boto3.resource('s3', aws_access_key_id="minio",
                                  aws_secret_access_key="minio123",
                                  endpoint_url="http://minio:9000",
                                  config=Config(signature_version='s3v4'))

        object = resource.Object("com-graphgrid-datasets",
                                 "graph_training_data.txt")

        object.put(Body=(bytes(training_file.encode('UTF-8'))))


def main():
    fire.Fire(Pipeline)


if __name__ == '__main__':
    main()
Building the airflow-tutorial docker image
Now that we've created the continuous ingest dockerfile, the ETL DAG, and modified
script.py, we can finally build the docker image. First, we referenced our
docker image within our DAG as:
t2 = DockerOperator(
    ...
    image="airflow-tutorial",
    ...
)
This means that we need to tag our docker image with the same airflow-tutorial tag.
Therefore, the following command can be run in a terminal to create our docker image.
cd ${var.misc.graphgrid_data}/airflow_tutorial
docker build -t airflow-tutorial -f continuous_ingest.dockerfile .
cd ${var.misc.graphgrid_data}/..
Uploading our DAG for use
Finally, we must use graphgrid airflow upload <path/to/DAG.py>, i.e. ./bin/graphgrid airflow upload ${var.misc.graphgrid_data}/airflow_tutorial/dag.py
from the top level directory within the local CDP install
if saved under the tutorial directory, in order to upload a custom DAG into Airflow's DagBag.
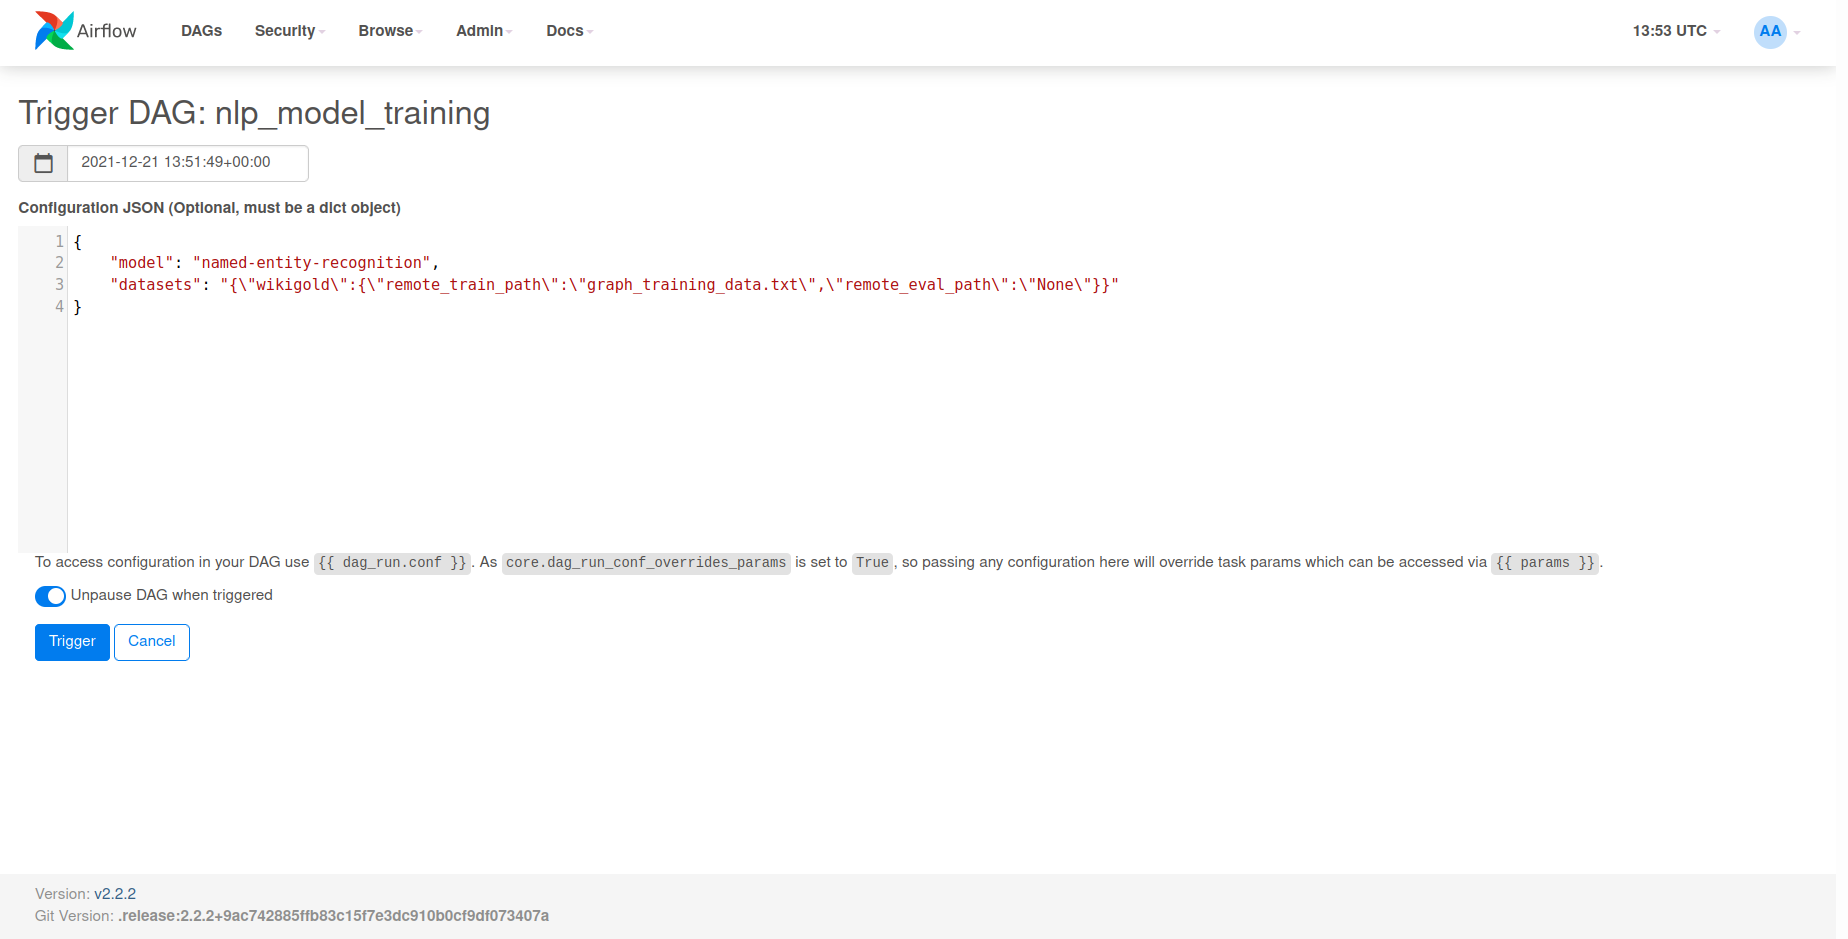
Then we can open Airflow at $API_BASE:8081 and either Trigger the DAG or toggle the DAG into the On state which will
automatically schedule it to run. Once we've run automatic ingest, we can yet again kick off a new training session
with our newly ingested data via the same request body as before:
Airflow may take up to 1 minute to add new DAGs to the Webserver UI as it runs scans every minute.
{
    "model": "named_entity_recognition",
    "datasets": "{\"wikigold\":{\"train\":\"graph_training_data.txt\",\"eval\":\"None\"}}"
}
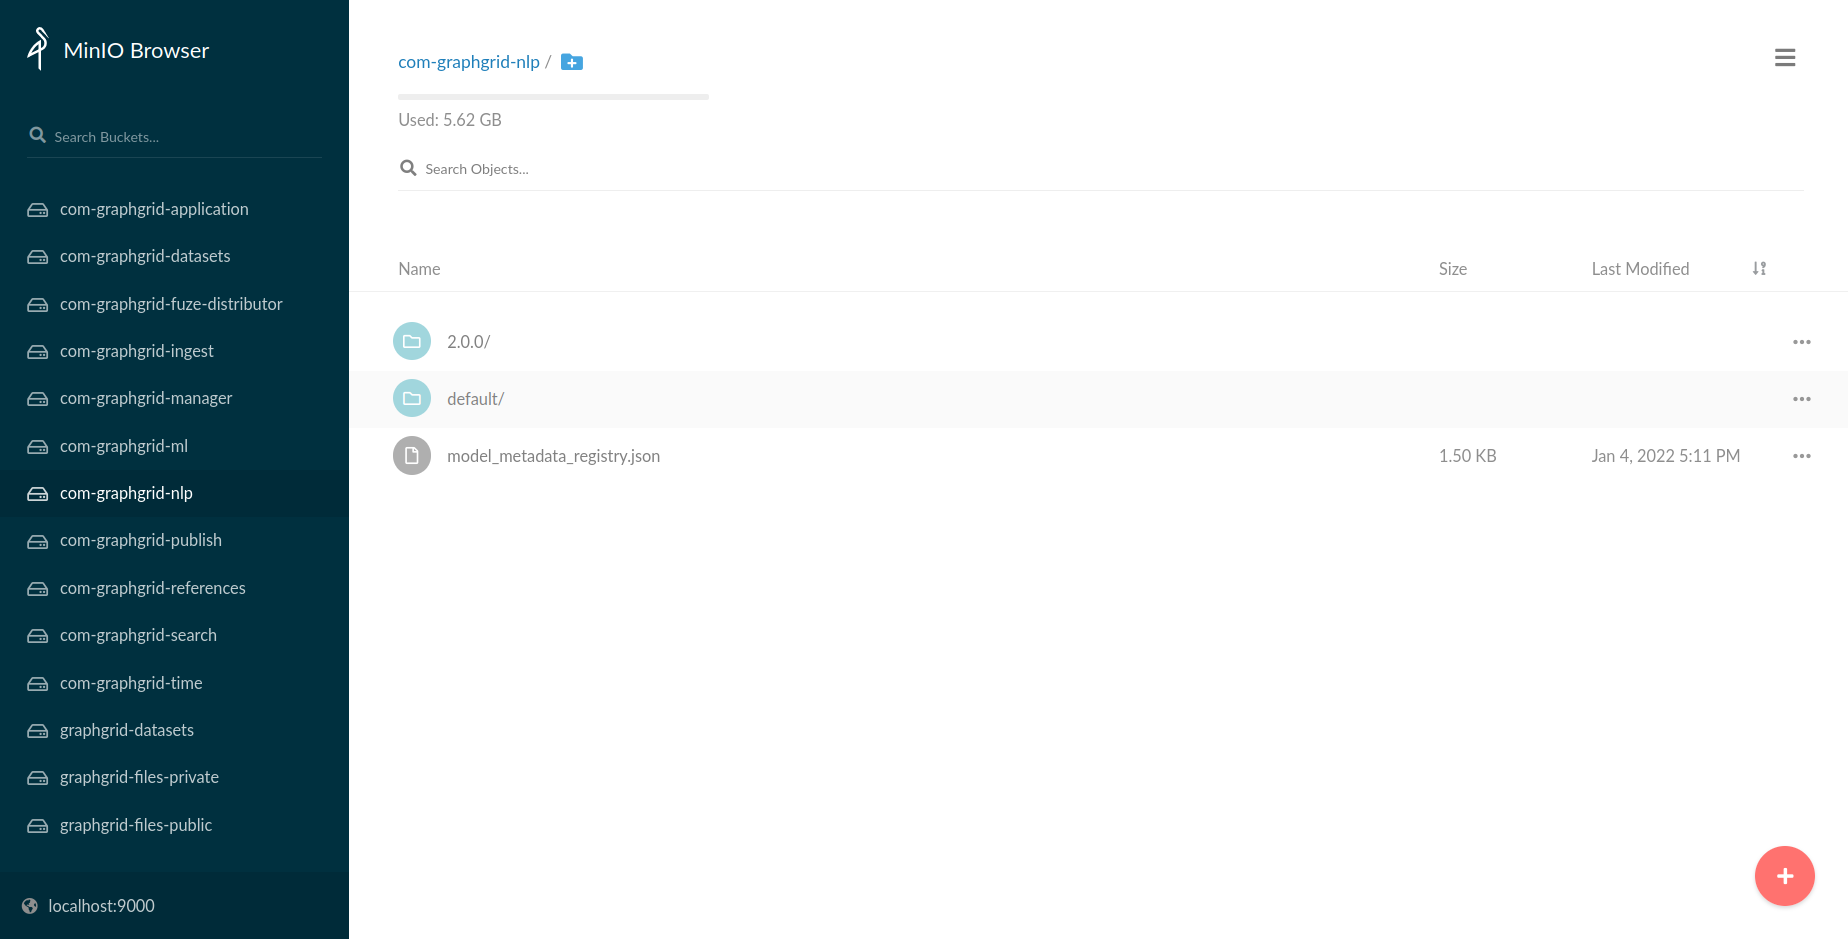
Using the newly trained model with the NLP module
Now that we've trained a new NER model, we can load this model for immediate use with
the NLP module. First, we need to head to $API_BASE:9000 in order to access our running
MinIO server. If using the default credentials, you can log in using:
Default username: minio
Default password: minio123
otherwise, use the randomly generated credentials. From the homepage, select the bucket
com-graphgrid-nlp, which houses all NLP resources and newly trained NLP models. Models
will be stored under a CDP version specific folder, e.g. 2.0.0. This is for use with the
model metadata registry in order to track models by CDP release.
Traversing within the 2.0.0 subfolder, we can see our newly trained NER model, which
was named 20220104T220538-nerModel.
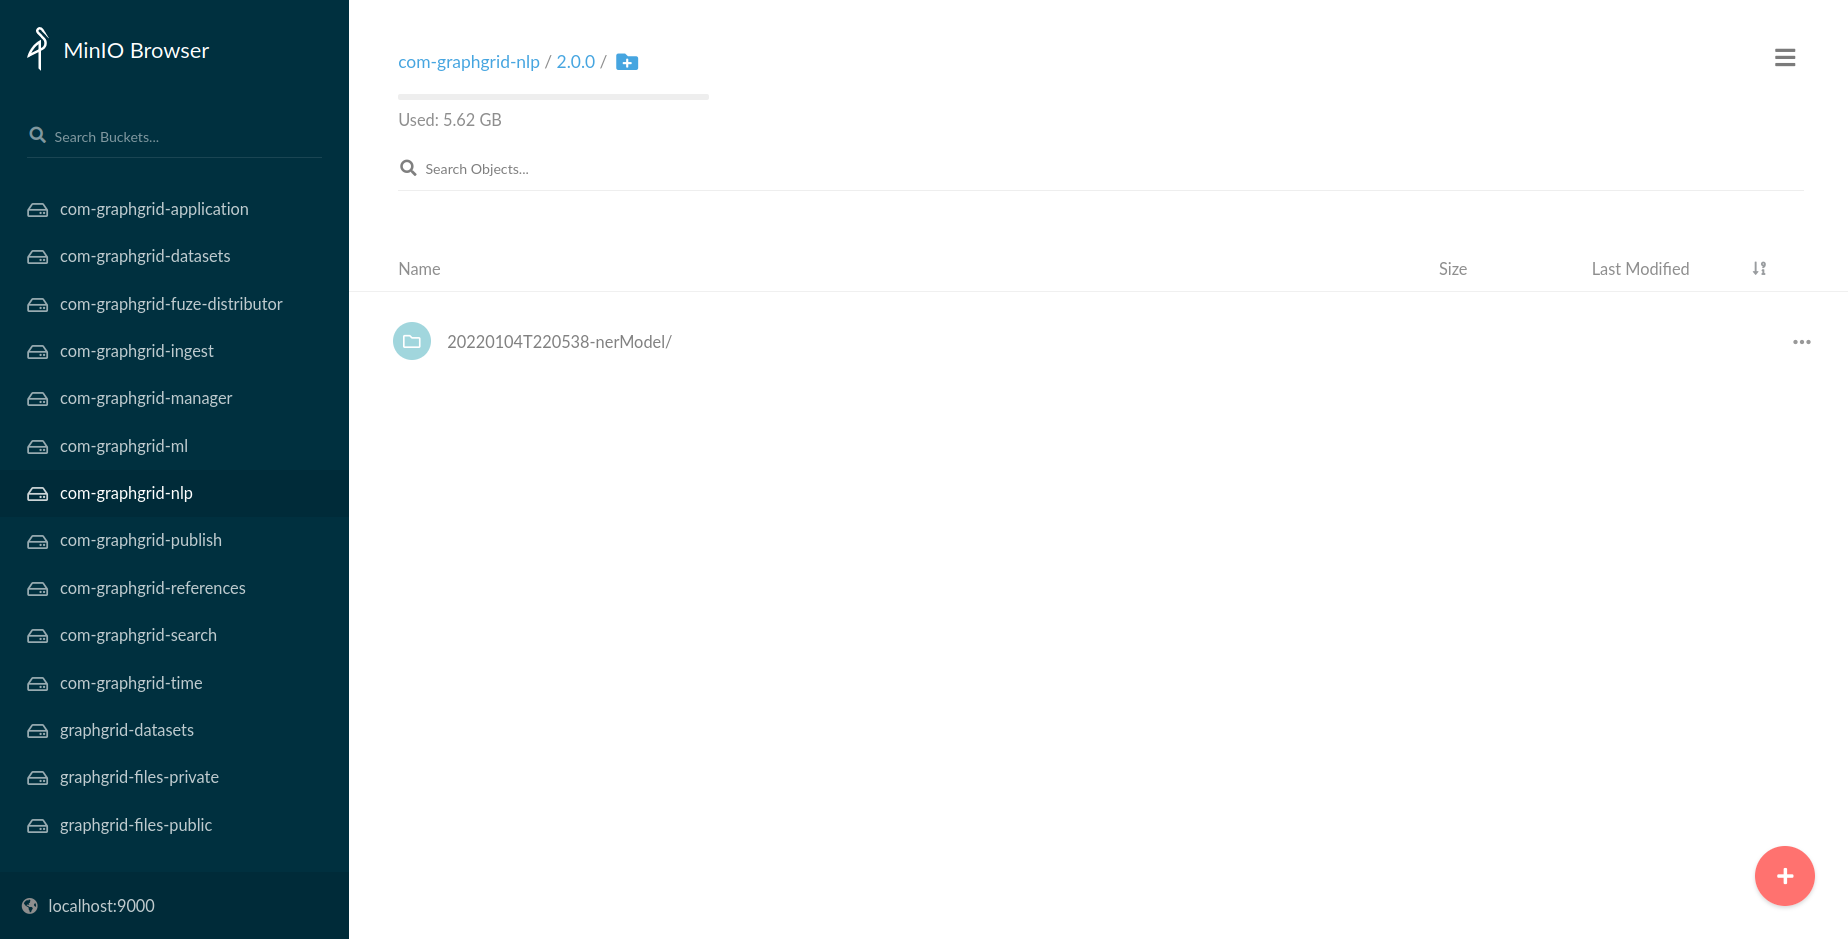
Using this information, i.e. the name of the model, we can utilize NLP's loadModel endpoint
and specify 20220104T220538-nerModel, in order to use our newly trained model!
curl --location --request GET "${var.api.shellBase}/1.0/nlp/loadModel/20220104T220538-nerModel" \
--header "Authorization: Bearer ${var.api.auth.shellBearer}"
Conclusion
In this tutorial we outlined how to set up a basic python environment to develop a means of extracting data from ONgDB. We developed a custom ETL pipeline that takes our personalized data from ONgDB, converts it to the Wikigold format, and saves it to MinIO. This then allowed us to kick off a new training session for the NLP-model-training DAG to train a new named_entity_recognition model. Finally, we took this a step further and converted our script into a scheduled DAG that would extract data from ONgDB hourly.
This tutorial demonstrates one of the many possibilities with how we can take new data sources and generate new NLP models based upon their data. All models can be retrained with the same or similar steps.